MQTT Device Setting and Information
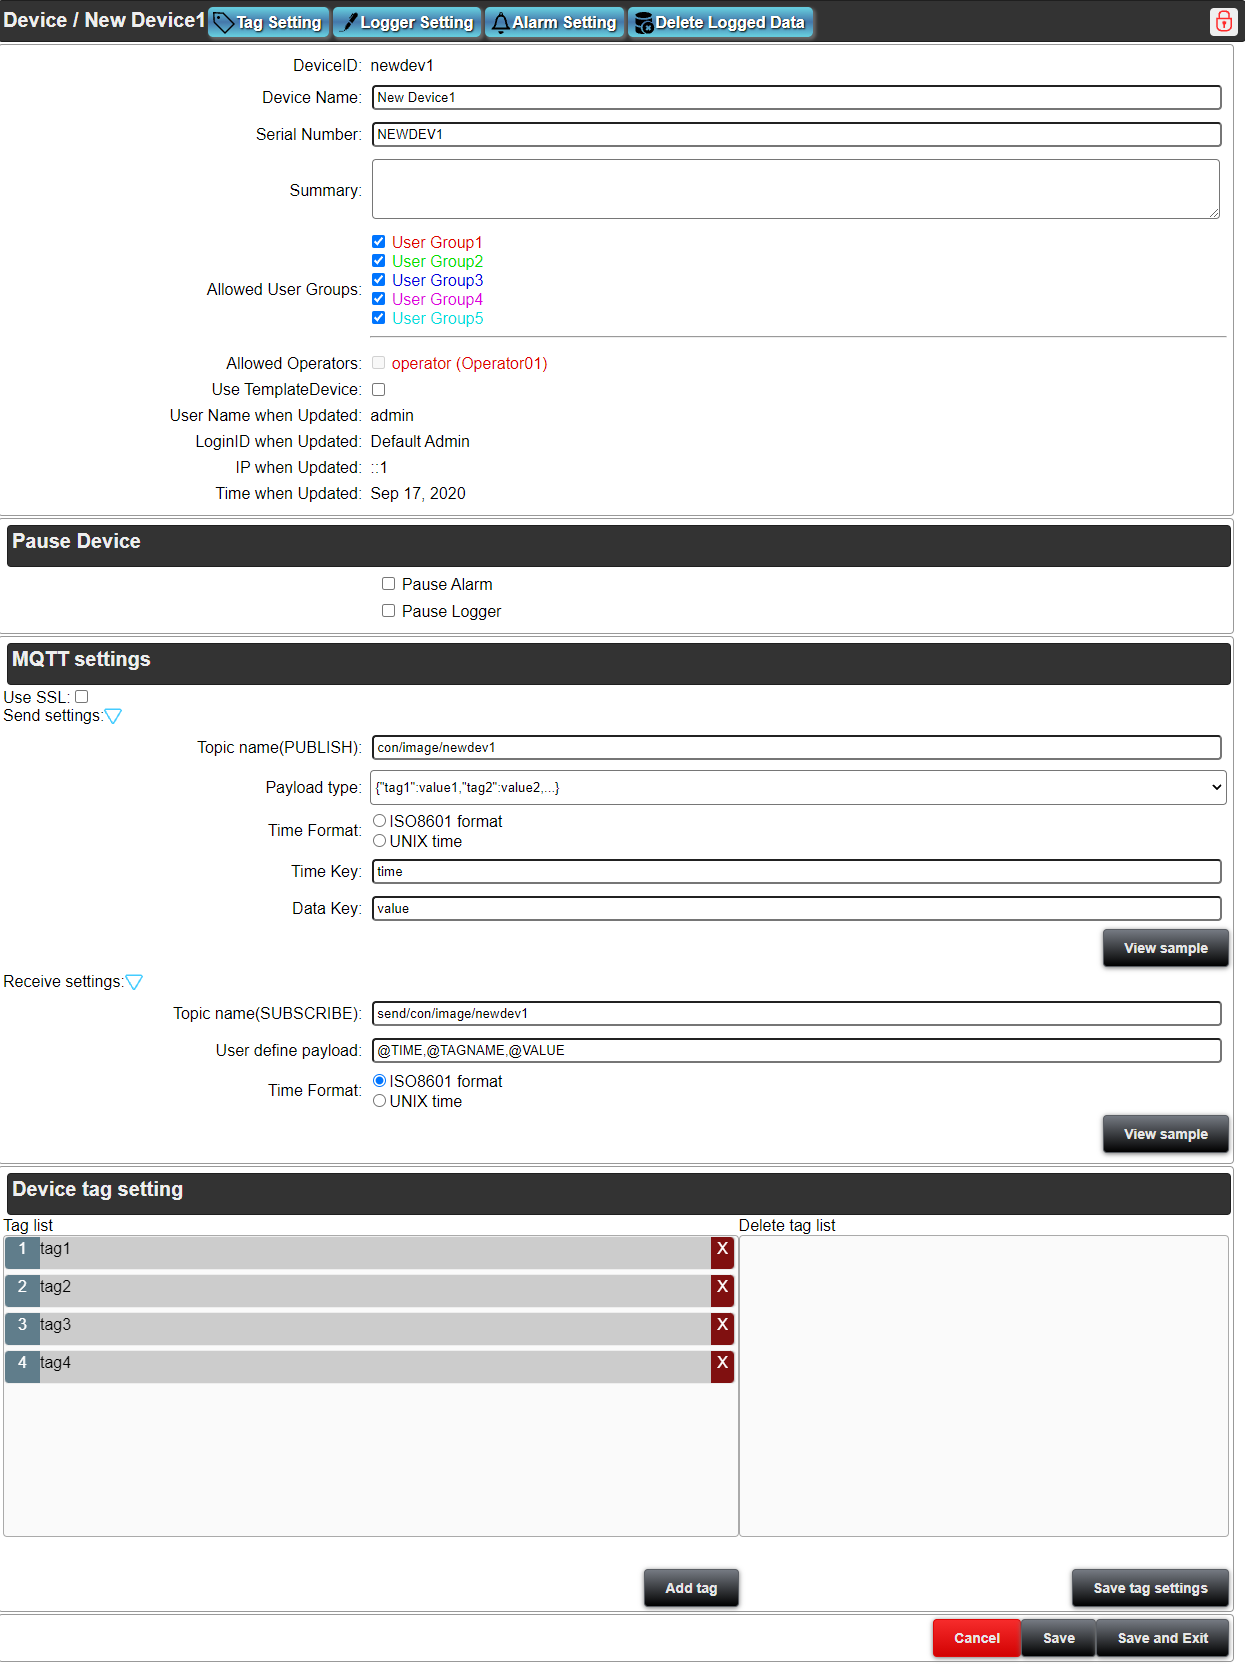
You can set and confirm the settings of the MQTT device on this page.
Buttons on the title
There are following 2 buttons on the title bar
Tag Settings :The tag setting screen appears. You can set tagname, engineering value conversion formular etc for the device data.
Logger Setting :You can set whether or not to save device data into the logger database.
Alarm Setting :You can configure the alarm detection settings, and send email when alarm is detected.
Delete Logged Data :Delete the saved data in the database of the server. Administrator rights are required.
Unlock:This button is displayed if the device is locked. Only the administrator or the user who has locked the device can unlock it.
Lock:This button is displayed if the device is not locked. A locked device cannot be changed or deleted.
Settings and Information
Device ID
This ID identifies the unique device in the project.
The device ID is a string that starts with lower case of alphabet letters, and combined with numeric number.
Set the ID with up to 10 letters.
Device Name
This is a unique device name in the project. This name is displayed in the Device list.
Set the device name with up to 40 letters.
You can get the device name by the HMI link variable (dt:device ID:_name_).
Serial Number
The serial number of the device. The server identifies the device by this serial number.
The serial number can be up to 13 characters.
Summary
An overview of the device settings. Any text can be entered.
The maximum length is 100 characters.
Allowed User Groups
Specifies the group that can view the device in the runtime environment. Users belonging to the allowed groups can view the data of this device.
When an operation group is authorized, users belonging to this group will also be authorized.
Allowed Operators
Specify the users who can view the device in the runtime environment. For users who can operate the device, place a checkmark in the checkbox to the left of the login ID.
The project administrator, general configuration users, and page editing users can all view the device.
Use Template Device
When enabled, you will see the device ID to be inherited as a template device.
The devices available as a template device must be of the same device type and must not already inherit from other template device.
If you have already set up a template device, uncheck this option, this software will copy tag settings and log settings from the template device.
Template Device ID
Select the template device to be used.
The device will inherit tag settings, logger settings, and alarm settings from the template device.
Tag settings, logger settings cannot be changed because it is inherited from the template device.
However, alarm settings can be added or changed.
For a device set as a template device, some settings (tag name, data type, data size, and logger flag) in the tag settings and logger settings cannot be changed.
See here about how to view the device data that inherit from a template device data on HMI page.
Pause Device
Pause Alarm
Check off ☑ the box to pause the alarm. Error data from the device will not be detected until the pause is automatically canceled. Neither saving the error status nor sending an error mail are performed.
Pause Logger
Check off ☑ the box to pause the logger. Data from the device will not be saved until the pause is automatically canceled. (Changes are reflected on the HMI screen.)
Auto Recover Date, Time
You need to set Auto recovering date and time when the box of “Pause Device” or “Pause Logger” is checked. “Pause” will be canceled automatically when the set data and time come.
Login ID when Updated
This is the login ID when the device setting was last updated. (cannot be changed)
User Name when Updated
This is the user name when the device setting was last updated. (cannot be changed)
IP when Updated
This is the IP address of terminal when the device setting was last updated. (cannot be changed)
Time when Updated
This is the time when the device setting was last updated. (cannot be changed)
Lock Login ID
The login user ID that locked the device.
Lock User
The name of the user who locked the device.
Lock Time
The time when the device was locked.(cannot be changed)
MQTT Settings
Use SSL
By checking this option, you can connect to the broker using the SSL port of the MQTT Broker Setting with high security.
If not checked, connect using the normal port number. Data is sent in plain text.
Send settings
Configure the settings for sending data from the device to the cloud server.
Topic name (PUBLISH)
Enter the topic name which the device uses to publish the data to the server.
The topic name can contain up to 100 single-byte alphanumeric characters and /.
Payload type
You can select the JSON data structure that the device publish the data.
Time format
Select the format of the time stamp in the message to be sent.
Server time:The time when the data is received by the server is used instead of referring to the time stamp in the message.
ISO8601 format:The time stamp in the message is a string in ISO8601 format.
Unix time:The timestamp in the message is a Unix time string.
Time Key
Set the JSON "Time Key" defined in the transmission payload type.
Data Key
Set the JSON "Data Key" defined in the transmission payload type.
You can see a sample JSON string according to the setting.
User defined payload
If you select "User defined payload" as the transmission payload type, a text box for defining the payload appears.
Define the JSON structure of the payload using the following meta string.
The definition must be in correct JSON format.
| Meta string | Meaning |
|---|---|
| @TIME | Means the timestamp of the tag value. It is related to the choice of time format. It must be defined outside the @TAGS_~@_TAGS block. |
| @TAGNAME | Means an auto-generated name in Tag Settings. It must be defined in the @ TAGS_ ~ @ _TAGS block. |
| @VALUE | Means tag value. It must be defined in the @TAGS_ ~ @_TAGS block. |
| @TAGS_,@_TAGS | Parse the string from @TAGS_ to @_TAGS and extract the tag name and value of multiple tags from the JSON string sent to the MQTT proxy based on the relationship between @TAGNAME and @VALUE. |
About user-defined payloads
For example, when the following user-defined payload and device tags exist:
User defined payload:{"T":@TIME,"data":[@TAGS_{"@TAGNAME":@VALUE}@_TAGS]}
Tag:tag1,tag2,tag3
The time format is Unix timestamp, and the message that the topic can receive is the following JSON.
{"T":"1577804400","data":[{"tag1":1},{"tag2":2},{"tag3":3}]}
In this case, the values of tag1, tag2, and tag3 are 1, 2, and 3, respectively, and the time stamp is 1577804400, it means 2020/1/1 00:00:00 (Japan time: +09: 00).
About user-defined payloads
User-defined payload for sending (PUBLISH) data to device to when the tag is changed (output) on the HMI page.
User define payload:@TIME,@TAGNAME,@VALUE
Tag:tag1,output_value:12345
The time format is Unix time, and the message to PUBLISH to the topic is as follows.
1577804400,tag1,12345
The time stamp (Unix Timestamp 1577804400) is the time when the value was changed (in this case, 2020/1/1 00:00:00 (Japan time: +09: 00)).
About history data
If you want to receive time-series data in a single transmission, turn on the check box for "Enable historical data," enter the array key that exists in JSON into the JSON key, and save it.
For example, in the following configuration
User define payload:{"T":@TIME,"data":[@TAGS_{"@TAGNAME":@VALUE}@_TAGS]}
Tag:tag1,tag2,tag3
Time Format:UNIX time
Enabled hisotrical data:YES
JSON Key:Data
The message to PUBLISH to the topic is as follows.
{"Data":[
{"T":"1577804400","data":[{"tag1":1},{"tag2":2},{"tag3":3}]},
{"T":"1577804401","data":[{"tag1":11},{"tag2":12},{"tag3":13}]}
]}
In this case, the values of tag1, tag2, and tag3 are as shown in the following table.
| DateTime | tag1 | tag2 | tag3 |
|---|---|---|---|
| 2020/1/1 00:00:00(Japan Time:+09:00) | 1 | 2 | 3 |
| 2020/1/1 00:00:01(Japan Time:+09:00) | 11 | 12 | 13 |
Custom data format
If you select "Custom data format" as the transmission payload type, a text box that determines the data definition appears.
The definition to convert the character string in Data key in JSON to tag data can be set here.
Converts an element whose JSON property name is Data Key
The following characters are used in the definition.
- B:Binary number
- O:Octal number
- D:Decimal number
- X:Hexadecimal
- S:Direct value
Base conversion options
- i:Convert to signed 32-bit integer(default)
- u:Convert to unsigned 32-bit integer
Define the data definition with a description like "XXXX(Auto Name)" or "X4(Auto Name)".
In this case, the tag value is the value obtained by converting 4 hexadecimal characters to an integer.
If there are multiple tags, a definition corresponding to the input value is required with a description such as "XXXX(Auto Name2)DDDD(Auto Name2)".
In addition, by default, it is converted to a signed integer when converting to decimal, but if it is defined like uXXXX (Auto Name2), it can be converted to an unsigned integer.
Since conversion is limited to 32 bits, values exceeding it cannot be converted.
A setting example and an acquisition example are shown below.
Data Key:data
Time Key:time
Custom data format:"XXXX(tag1)DDDD(tag2)OOOO(tag3)SSSS(tag4)"
Tags:tag1,tag2,tag3,tag4
Send JSON:{"time":"2020-01-01T00:00:00","data":"10001000100010.0"}
- tag1:4096
- tag2:1000
- tag3:512
- tag4:10.0
You can also set Engineering Value Conversion to the acquired tag value.
Receive settings
Configure settings to send from the server to the device when the tag value is changed from the HMI Page.
Topic (SUBSCRIBE)
Set the topic name to subscribe data.
User define payload
Defines the structure of the message that is output from the server to the topic.
Unlike the transmission setting, one tag name and tag value are included in the message.
The message content is not particularly limited and can be defined using the following meta-characters:
| Meta string | Means |
|---|---|
| @TIME | This means a timestamp indicating the time when the value is updated. The time format is selected. |
| @TAGNAME | Means an auto-generated name in Tag Settings. |
| @VALUE | Means tag value. |
Time format
Select the time stamp format corresponding to @TIME in the payload.
You can see a sample message that the server publishes to the topic.
Device tag settings
Add and remove tags from the device.
Tag list
Displays the tags that are set or added to the device.
The tag displayed here corresponds to the automatically generated name on Tag Setting page.
Click the X button on the right of the tag to move to the tag to be deleted.
Delete Tag List
The tags to be deleted are displayed.
Click the x button on the right of the tag to move to the tag list.
button
The Add Tag dialogboxopens and you can add tags.
button
Save the existing tags in the tag list and delete the tags to be deleted.
button
Returns to “Device List” without saving the changes.
button
Save the current changes.
button
Save the current changes and return to "Device List".
Add tag dialogbox
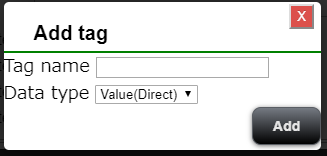
Tag name
Enter the name of the tag to add.
Data type
Set the data type of the tag to be added.
button
Add a tag to the tag list.
* Since it is not saved in the server at this time, it is necessary to save it with the "Save Tag Setting" button.