(CONPROSYS device) PLC Configuration
This section describes how to connect the CONPROSYS device with PLC.
PLC configuration should be done in order of "Link config", "CPU config", "Device config".
1.Link config
This sets how to connect with PLC.
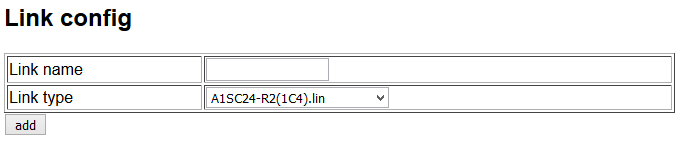
Enter a name in the Link name and choose the communication unit from the Link type.
Use only alphamerical letters for the Link name.
Select a communication unit for a Mitsubishi or Omron PLC.
And to link with other makers' PLC by using Modbus protocol, select "Modbus TCP" for the Ethernet connection, and "Modbus RTU" for the serial-connection.
For the Ethernet connection, set the IP address and the port number of the connecting PLC.
For the RS-232c/RS-485 connection, set the serial port, baud rate, data bit, and parity.
(1) Enter a link name and select a link type. Click the “add”.
(2) The additional setting appears under the “add” button. Click the “config”.

(3) Details of Link configuration appears on the monitor.
The details differ depending on selected link types (Serial or Ethernet).
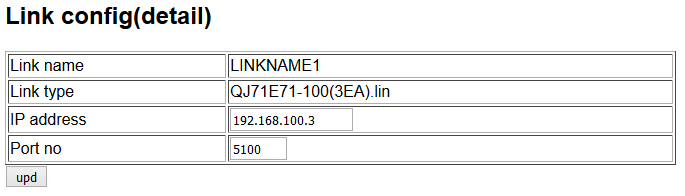
(4) Enter communication setting to connect to PLC and click the “upd”.
2.CPU config
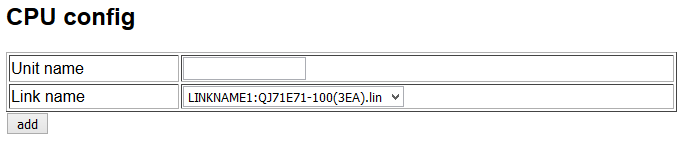
Select the registered name from the Link config, and enter a name for CPU that is connected to the Link.
Use only alphamerical letters for the name.
When connecting through Ethernet, one Link connects one CPU. When connecting through RS-485, more than one CPU (or called station) can be registered.
Here in this CPU config, set the type and station number of the connected CPU, and name it as the unit name.
(1) Enter CPU name and select a link name. Click the “add”.
(2) The additional setting appears under the “add” button. Click the “config”.

(3) Enter the communication setting on the CPU configuration detail.
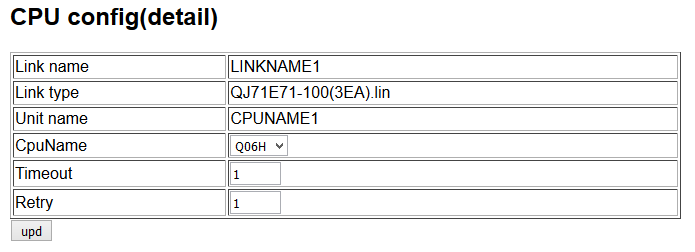
(4) Click the “upd”.
3.Device config
Select the registered unit name from the CPU config, and enter a name for a device that is connected.
Use only alphamerical letters for the name.
(1) Enter a Device name and select CPU. Click the “add”.
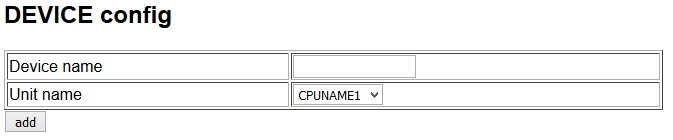
(2) The additional setting appears under the “add” button. Click the “config.
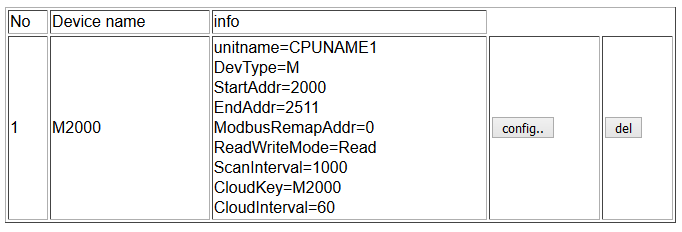
Set an access address, Modbus address for writing, and cloud setting.
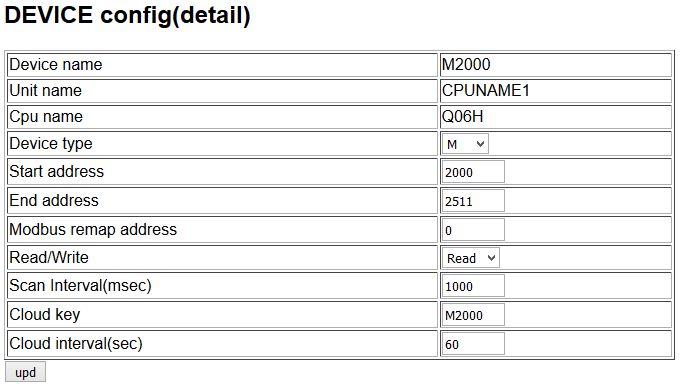
Setting Name Meaning Device type This selects a required device type. Configurable contents differ depending on the selection of CPU. Start address(dec) Configurable contents differ depending on the selection of CPU. End address(dec) This selects either to read from or write data in Modbus address. Modbus address(dec) This specifies the head address of Modbus to read or write in decimal. Read/Write This selects either to read from or write data in Modbus address. Scan Interval(msec) This specifies a communication interval Cloud key This specifies a key to be attached to a head column of sending data (csv file) to a server. If not specified, data sending will not be performed.。Use the URL in data transfer setting to send data . Cloud interval(sec) This specifies an interval of data transfer.
(4) Click the “config".